How To Install Skins In Football Manager 2023
The default skin in Football Manager is clean and simple without any complications, but sometimes it's nice to explore other options and there's nothing wrong with that. This is where custom skins come in and can bring new life to your game's appearance. Every year, new skins get released that are compatible with the latest FM edition. Sometimes however these skins aren't updated by the creators when the game is and that can lead to some small issues, you also can't leave feedback on user issues unless you're able to message them or comment on a thread about it.
But, that said, they are great and get thousands of downloads by users eager to mix up their FM skin. If you haven't done this before, don't fear as the handy step-by-step guide below will help you.
Where can I find a skin for Football Manager?
Simply search for one on the big wide interweb or you can click here to be taken to our resources sections where you will find some skins for FM23. Just make sure that whatever skin you download is compatible with the FM edition you are wanting to change the skin in.
How to Install The Skin
Here's the step-by-step guide to get you started with downloading skins for Football Manager.
Step 1 - Download a skin
FM skins are usually uploaded with some images so you can see how they look in-game. Find one you like the look of, check it matches your FM edition and click to download it.
(Note- If you try to download a FM skin for FM20 for FM23 it will not work, it has to be a skin for your specific edition.)
Step 2 - Extract the skin zip file
Now that you have your skin pack downloaded, you’ll need to extract the files using programs such as WinRar or 7zip on Windows or use the Unarchiver on Mac. Once extracted, make sure you put them in an easy to find location so you can access them later on.
Step 3 - Put the extracted file into Football Manager
Open your file explorer and locate the Sports Interactive folder, select the edition of FM you want to load the skin pack into, and open it up.
Once you have the Football Manager file open, look for a folder called Skins.
Now you need to find the skin pack you extracted in step 2 and move it into the skins folder you just located.
Location access address depending on your operating system:
Windows:
C:\Users\Documents\Sports Interactive\Football Manager 2023\skins
Mac:
Users/Mac USERNAME/Library/Application Support/Sports Interactive

Step 4 - Enable to skin in the game
You’ve successfully installed the FM Skin in your Skin folder within Football Manager, now you need to load up your saved game and do the following:
Click ‘FM’ in the top right.
- Click ‘FM’ in the top right.
- Click on ‘Preferences’.
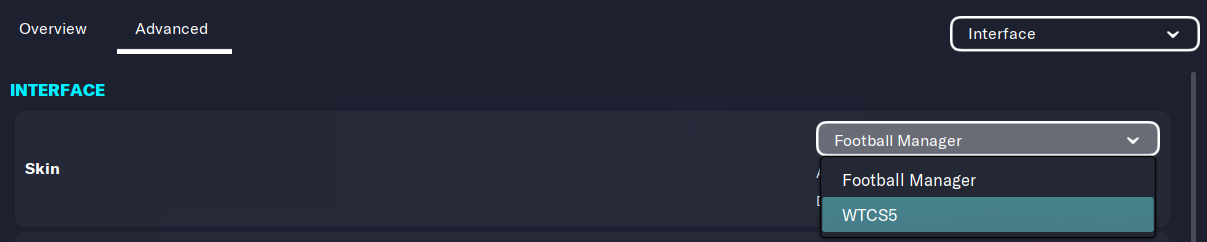
- Click ‘Advanced’ in the top left.
- In the top right, open the drop down menu and select ‘Interface’.
- In the bottom left, open the drop down menu and click ‘Clear Cache’.
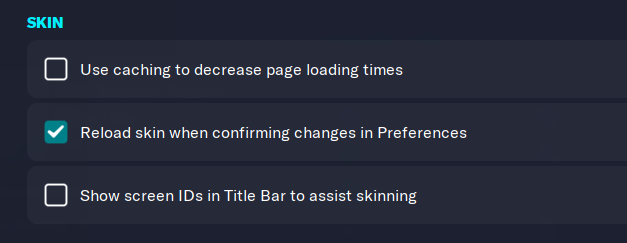
- Under the heading ‘Skin’, disable ‘Use Caching to decrease loading times’, and enable ‘Reload skin when confirming changes in Preferences’.
- In the bottom right, click ‘Confirm’.
Step 5 - Enjoy the skin
Enjoy the skin you just loaded into your game. If you do experience any issues you can just revert the changes and go back to using the default skin.